Saturday, January 31, 2015

Project Life Week One Re-Do and Last Chance for Year Noted!

The month has quietly slipped away from me, and today is the 31st of January!  I have several pages finished for the month, yay!!!  My Canon Selphy has proven to be quite the little workhorse to get my life down in the books.  I am a happy scrapper to say the least.  :)

I wanted to show you this page re-do today (here is my original and unfortunate beginning) in case you were inspired to grab the Year Noted Kit from my website today which will be your last chance!

The other cards I used for this page are from the Chalk It Up Picture My Life Kit.
I adore these little banners for making strings of embellies!  I also love the dotted line and check-box stamps for journaling lists of anything and everything!


You knew you would see this little image in my pages again, didn't you?  Glitter Glam is such a fun set!  I had a leftover scrap of White Daisy CS with the reverse part of a Scallop Border Punch to it...waste not, want not!  The Teal Glitter paper and the Chalk It Up products were a match made in scrapbook heaven!

Teal Glitter Paper?  YES, Please!
That little heart stamped my my niece and nephew pooches is found in this month's Stamp of the Month, so you might want to check it out too before the end of the day!  ;)  If for any reason you don't get this until January is over, and you REALLY want to get your hands on it, shoot me a message and I will try to help!  :)

THESE My Acrylix Stamps will definitely be unavailable after today, however, so check out the retiring list NOW!  ;)


One More for Year Noted!

I hope you guys are notified of this post before the month is over, but I just realized I used the Year Noted Kit to make this GREAT, glitterfied PML card for one of my latest pages.


I stamped my favorite images from the Glitter Glam My Acrylix from Close to My Heart in their Lagoon and Black Exclusive Ink. This triangle-themed paper from Year Noted was PERFECT to use with the on-trend Triangle Border Punch.  Let me show you how I backed it with my Gold Shimmer Trim...


Yep, it was that easy!  :)  Year Noted is only available this month while supplies last, so get it today while you can!  Just one $50 order on my website will qualify you for BOTH Year Noted AND the January Stamp of the Month for $5 each, so don't miss out on the SUPER deal!  :)


Thursday, January 29, 2015

Throwback Thursday Scrapbooking Tips!

I am throwin' back to the beach again today to bring you a quick and easy tip for hiding those "not so picturesque" parts of your pics. 

This is the second page of my layout I showed you on Monday HERE...


See how I used the inch and a half border that was left from the Paper Fundamentals Whimsey Assortment to frame this one?

I wanted to use this picture, but one of my kiddos' derrieres was pretty prominent, lol, and I really couldn't crop it out without altering the pic too much...


A clever bit of journal box placement was all it took to remedy the situation so that everyone would be happy.  ;)  I love the way the dark CS looks with the white Gelly Roll ink...


Remember, there are never any mistakes in scrapbooking--only opportunities for embellishment!  ;)

Last week to get this one!

Time is almost up for this one too!


Wednesday, January 28, 2015

Love Ya Silly Valentine's Day Card Workshop!

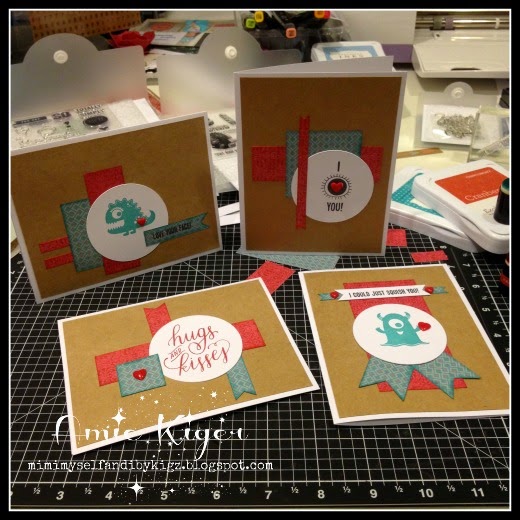
Just a week left to RSVP for my Valentine's Day Card Workshop!   Here are the cutie-pie cards I have planned.  It includes the 6x6 cutting guide and patterns I found HERE on the Viva la Verve Blog.


I used the Love Ya Silly My Acrylix from Close to My Heart, and the Xoxo size M stamp.


I will have some added fun embellishments to add as well as alternate sentiments for those who need other types of cards!  :)  Cost of this workshop is $10 for four cards with envelopes, and we will be meeting at 7pm on Saturday, February 7th in my Craft Cave.  Who wants in on this one?


Monday, January 26, 2015

Using Negative Cricut Cuts on Your Scrapbook Pages

Goooooooood MORNING!  I am extremely upbeat and chipper today!  Don't hold it against me because I am typing this on Sunday, not Monday, lol!  ;)

Anyway, I showed my Facebook fans a sneaky peek of this fantastically easy layout that I made by using the part of my Cricut cut that I would normally discard--the negative.  Follow me on Facebook HERE to see more sneak peeks like this one.

I cut out a bunch of circles with my Cricut and was left with this...
I am a keeper, let me tell you...so as I was tossing it out, that little voice popped out and whispered, KEEP IT!  Use it!  I have learned to listen to that little voice, my friends!  ;)

I carefully evened up all the edges, and used it to make a cute little beach layout with the Seaside Paper Packet and the Paper Fundamentals Whimsy Collection...


Here comes that gold polka-dot vellum from the retired Free to Be Me Kit...I am down to just a little bit left, gasp!


This is what the White Daisy CS looked like on the back as I was using my ATG to adhere the little squares of paper and the pics...


It was really easy, and I think it makes a BIG statement! 

Year Noted is available in January ONLY!

Available to help support Operation Smile through March!

Stamp of the Month for January ONLY! 

Wednesday, January 21, 2015

A Cupid for Valentine's Day

I'm really rolling in the love theme after that Valentine's Day blog hop this weekend.  Here is another heart-tastic card creation to spark your creativity...


This one uses another one of Close to My Heart's fab Hostess Rewards Stamp Sets.  It is called Happy Hexagons and has a variety of sentiments, along with these fantastically formable hearts...


The hexagons in this set coordinate with the Cricut Artbooking Cartridge.


The rest of these images are found on the lovely Forever in My Heart and January Stamp of the Month My Acrylix stamp sets.  I used the CTMH Exclusive Inks Hollyhock and Black.


Monday, January 19, 2015

Be Amazing (Yes, YOU!)

Is there a day of the week that starts with a P or a J???  I need a catchy little way to introduce these little cards for PML or PL or call them Journaling Cards if you like, but I need a coordinating day...how about an eighth day of the week called Paperday?  Oh how I wish!!!  :)

Here is the latest of the cards I made with the Year Noted Kit for National Papercrafting Month...


I thought the Gold Polka-Dot Washi was a lovely coordinating product, how about you?


I stamped the "BE AMAZING" image from the current Stamp of the Month in Sorbet Ink (twice without re-inking.)  The arrow from the Year Noted Kit is stamped in Black.  That pretty little glittery gold butterfly is in the CTMH Junebug Puffies.


I don't know about you, but I am REALLY loving the gold accents, and I am usually a silver girl!  It reminds me a lot of Teresa Collins new lines this year.  :)


Saturday, January 17, 2015

Damask Divas Valentine's Day Blog Hop!


 You are correct!  It is NOT Valentine's Day....YET!  So that means you have plenty of time to soak in some inspiration from our Blog Hop, order up some fantastic products, and get your own projects made in time for February 14th!  :)

This hop is brought to you by the Damask Divas Team led by the amazing Mandy Leahy!  It goes in a big circle, so all you have to do is read each Divas' post, find the name of the next crafty blogger and click on the link to take you there!  If you happen to get lost along the way, just head on over to the Damask Divas Blog for the entire line-up.  No easy button required!  Ready or not, here we go!

My project involved finding a way to send my friends a little gifty that I had made for them at Sticky9.  I wanted to hide the photo magnet in a little pocket card...and wow, did it EVER work out!


I used the fabulous NEW Heartstrings Paper Packet from Close to My Heart, along with Red Shimmer Trim, Red Enamel Hearts, Forever in My Heart My Acrylix, Pixie Extra Thick Twine, Whisper and Cranberry Exclusive Inks, Indian Corn Blue CS, 3-D Foam Tape, Base and Bling Free Thinker Charms, Stitch Guide, Piercing and Embossing Tool, and Scallop Border Punch.  (Pause for a breath, lol.)

Here is how the Cardstock pulls out of the pocket with the magnet inside...


I used our Foam Tape to pop the pocket up just the right amount to fit.  This view shows how you can just tape the messy ends of the twine to the back of the CS after using the Stitch Guide and a needle to thread it through.


Here is another way to make one!


I added some rose images from the Heartstrings Workshop on the GO Cardmaking Kit My Acrylix, along with some Base and Bling to match!  The leafy part of the stamped image is also colored over with the Leaf Green ShinHan Touch Twin Alcohol Marker


I just used my piercing tool to poke a hole in the CS.  Then I used my tiny little pliers for opening and closing the jump ring on the rose.  It was super-easy.  :)


Well, I sure hope you enjoyed my project today!  The amazing Jennifer Dykstra is up next on the hop, so click on over to see what she has to share!  :)

Don't forget to pick up these limited time offers this month as well!

Year Noted for National Papercrafting Month

Stamp of the Month