This challenge turned out to be great motivation for me to do a project re-do. I had found this sign on Pinterest, and made one of my own a while back that you can see here. It is almost painful to go back that far in my blogging days, lol! If you look, you will see that my link doesn't even work! Oy vey! Here is my original inspiration for this saying.
And here is my re-do!

I think we have some improvements upon last time, no? ;) Let's get into the details! I started by going into Cricut Craft Room to play around with the fonts on the Cricut Art Philosophy and Artiste Cartridges. You can do all sorts of things to alter your images and cuts, so if you want to play with word art, this is the place to be! It is totally free to use the Craft Room, you just have to own the cartridges to cut the things you design with them. This is what it looked like on my screen...
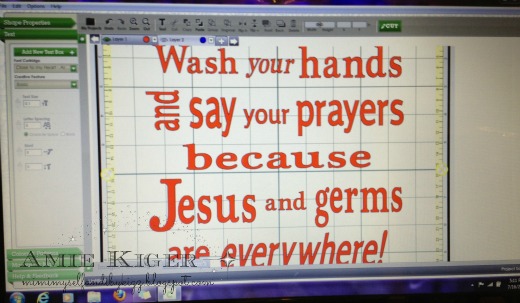
See how I was able to resize the letters and even tilt some of them? You do that by clicking and dragging your cursor over the words to group them. Then you can move them anywhere or edit them as a whole word. After I finished getting it all laid out just right (red), I copy pasted each portion to another tab (blue) so it would be spaced easily to fit all my papers on one cutting mat. Huge time saver there, and I didn't have to cut out the entire thing for each color paper I wanted to use! Did I mention how much I love this program?

I didn't want it to cut the letters just yet, though, so I switched out my blade housing for the Cricut black marker. This would be the base for attaching my lettering. Could you imagine lining up all those letters freehand? Yikes! I did a test run on scrap paper before actually writing it on this pattern from Close to My Heart's Surf's Up Paper Packet.

Then I laid out all the paper on my cutting mat according to which color paper I wanted each word to be and ran the cutting mat through just once! The outline of the marker gave the perfect pop to the patterns I used and even allowed me to offset some of the letters for a great effect. I love the dark grey glitter paper!

I popped up some of the letters with foam tape. See the long arrows stamped on each side of the phrase? I used Crystal Blue Ink and a brand new Autumn stamp set called One Way Borders to add those...pointing down for hands under the water, and pointing up for prayers on the way! ;)

Finally, the blinging could begin! This great wave was cut right on my Cricut E2 since the NEW Artbooking Cartridge is not available in CCR yet. Have you pre-ordered yours yet??? I also added glittery buttons and clear buttons as bubbles, and some Small Sparkle Flourishes and these great new Twist Ties (available August 1st) as some splash!

I used my paper piercing tool to give them a twist like this!


I added a cluster of splash to the top corner too...those are blue sparkles in the buttons. They won't be back in the next Idea Book, so get them by the end of July before they run out!

I hope you are inspired to come play along with us at Heart 2 Heart Challenges! We would LOVE to see what you make! Here is a quick link to the rules.
You have until the end of the month for all of the July challenges, so go get your craft on and show us YOUR sparkle! :)
Fabulous! Love the idea of using CCR and your markers first. Thanks for sharing!
ReplyDeleteI love it! So fun! I would not have thought of using markers to make placing the letters easier. I keep hearing about the Cricut Craft Room, but haven't tried it yet. You are inspiring me to give it a go. I am going to miss the colored sparkles. I just ordered a boatload.
ReplyDeleteSuper cute!
ReplyDeleteShiver me timbers and blow me away! This is AWESOME! You should put it in your Etsy shop (which you ought to have if you don't already). Love the tutorial, love the use of those tricky twist ties. Fantastic use of papercrafting supplies for home decor. I hope you post this to the CTMH BB, too. I could go on and on... L.O.V.E. it.
ReplyDelete