


It was so easy to use the Stitch Guide that I simply had to tell you about it! Here is a picture of what it looks like. See all the half-shapes? They only added half of the shape so that they could fit as many things on it as they could. You just flip the guide over and line up those center holes to poke the other half! It worked brilliantly!

Now, if you want to use the Stitch Guide, I HIGHLY suggest the Piercing Tool as well, and let me tell you why. I have heard from other consultants that other brand piercers do not fit the holes in the guide very well, and I don't want you to get this amazing tool home only to find that you cannot use it! I used this piercing tool pictured below that we sell at Close to My Heart, and it fit perfectly.

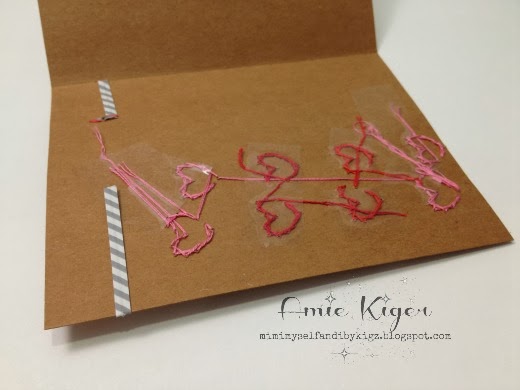
I cut a length of embroidery floss, and taped the end to my Kraft Cardstock. I'm linking up with the Simon Says Stamp Wednesday Challenge, Get Krafty for this one, too!

Then I sewed all the hearts by hand. It took some time, but the result is so cute and dimensional for a technique that is really easy to do!

You will notice quickly that the back side is not so perrrty. ;) No problem! I just cut a 4.25 x 5.5 inch piece of Kraft CS to attach right over the mess! Presto-change-O!

This sentiment is a combination of two stamps from the Lollydoodle Cardmaking Kit.

My FAVORITE part of this whole card is the little bow embellishment I put together with the Slate Striped Twist Ties. I used a retired Tulip brad to hold it together, and added a little Pink Glitter Gem.

That's it! Hope you have a fantastic weekend, and see you back here on Monday to see my new bling!!! :)


Love what you made and showed all of the steps ... even the messy inside. I have only ever used mine to poke the holes. That's actually awesome too. I can never work up the gusto to actually sew. How awesome is a tool that you can even get good results from if you only go half way?
ReplyDeleteI am behind it seems in replies! You know, this actually can be compared to people sometimes--looks all put together on the inside, but messy on the inside. Wow, that was a deep thought. I will have to try the holes your way sometime! :)
DeleteWhat an adorable card! I love the hearts and I really love the twist tie bow you made. Thanks so much for joining us at Freshly Made Sketches.
ReplyDeleteThanks so much, Karren! :)
DeleteOh my gosh! This is such a great card, and I love that stitch guide. How cool! Thanks for sharing with us at Freshly Made Sketches!
ReplyDeleteI think it will come in quite handy for sure! Thanks, Cindy! :)
Delete