How is it already June 6th??? Seriously.
OK, so I finally saw one of my BFF's to give her this FANTASTIC little birthday card...so I can FINALLY share it with you!!!
Isn't it just YUMMY?!?
I used a LOT of different toys to make this one...including my Sizzix Big Shot! Did you know Sizzix is giving away a $50 gift card to their shop??? Yep! You can totally get a Big Shot with that kind of dough!
I will make a list of everything I used at the bottom of my post...
This is the die set I used in my Sizzix Big Shot. It is from (shocker here, lol) Close to My Heart, Thin Cuts--Stars...
This shaker card was an absolute BLAST to make!
Here is my list of supplies...
Close to My Heart--
Thin Cuts--Stars
Little Dreamer Paper Packet
Sea Glass Cardstock and Glitter Paper
White Card Bases
Papertrey Ink--
Make it Market Shakers and Sprinkles Kit
Sparkle Die
Never let ANYONE dull your sparkle! Self admitted Cricut fanatic and Shimmer Trim addict. ;)
Showing posts with label Glitter Paper. Show all posts
Wednesday, June 7, 2017
Friday, September 26, 2014
A Cut Above for Halloween!
Are you busy making your Halloween treats? I am!
This time, Close to My Heart has come out with the PERFECT line of products for the uncrafty crafter! The best part is that even if you are a SUPER crafty crafter, these Cut Above kits are awesome for you too!
Here's what you get in the NEW Cut Above Halloween Treat Bag Kits...
While the candy is not included (more on this later) you DO get 10 pre-printed Treat Bag forms, 10 Treat Bags, 10 sets of 12 stickers that fit many round candies perfectly, 10 pre-cut circles for tags, and 12 foam squares. The only tools you need to provide are the stapler and a bit of adhesive.
The stickers are simple for anyone to place on the candies--even little helpers can do this part with ease!
Then you fill the plastic treat bag with the candies and staple it to the paper treat bag form. Guess what?
Close to My Heart has a tool for that! YES! The new Mini-Stapler comes filled with staples, and you can get 2000 more of these crafty-sized staples in a Refill for less than $3!
Your assembled bag could look like this...
I used my Scallop Circle Punch, #30yearsofhappy (FREE NOW!) My Acrylix, and the Sweet Salutations My Acrylix stamps to create this adorable tag. Yep, you guessed it--I altered my stamps again with my scissors to remove the To: and Fr:! ;)
The mini pumpkin is found in the Stamp of the Month from August, What a Hoot!. You just never know when you might need last month's Stamp of the Month! ;) I colored him in with the new ShinHan Touch Twin Alcohol markers in Marigold and Golden Yellow. The Silver Glitter Paper scallop sure adds just the right amount of sparkle!
So, what kinds of candy can you use to fill these? I have used Kisses, Rolos, and Peanut Butter Cups in mine so far and they work out great! You can fill 6-8 treat bags depending on how many candies you use. Here is a shot of the whole kit...
Now, I know that there are LOTS of people who can no longer bring candy into school for treat bags anymore, so I have a solution for you TOO!!! Tune in to Makeover Monday in just three days to see my ideas!
Time is running out on this month's Stamp of the Month! Get it before September is over for as little as $5!
![]() |
Family is Forever |
![]() |
#30yearsofhappy |
Tuesday, April 15, 2014
Tag (You're It!) Tuesday: It's For the Birds
Welcome back to my blog for another Tag (You're It!) creation!
This tag is dedicated to the birds who were forced to take a break from building their nests when it SNOWED yesterday, April 14th, in what is turning out to be THE LONGEST winter in the history of my life! (That sentence probably is too!) ;)
Alas, I have ZERO control over the weather here in the Midwest, but I am in FULL control over my creation today! Take THAT, snow!
I am just head over heals for this one, and I hope you are too!
Wouldn't this be perfect for some candy eggs? Chocolate, of course. I ate mine already, so I just used another kind of candy...hmmm better get to the store before the weekend! Ooops! ;) Anywhoooo, I am linking up with the Simon Says Happy Easter and/or Sweet Treats Challenge!
I used the following Close to My Heart products to make this little treat bag and tag:
Cricut Art Philosophy Collection (cartridge and dimensional elements tag)
Desert Sand CS
Pink Glitter Paper
Black and Grey Glitter Paper
Brown and Tan Glitter Paper
Burlap Ribbon
Skylark Textiles
Mini Medley Accents Wooden Collection (hemp baker's twine)
Let me show you how easy this was to make! Did you notice there were no stamps used? ;)
Start off by cutting a length of Burlap Ribbon that is just longer than your tag shape. Then trim off each side that has the thicker cord...
Now you can separate all the little fibers of burlap...
I used the Dimensional Elements Tag shape to have a sturdy base for the tag. You can cut the same shape tag out of the Desert Sand CS and attach it to the chipboard tag with Bonding Memories Glue.
Squeeze out a nice layer of liquid glass onto the CS to apply the pieces of the nest...
You don't have to be neat about this part...just lay the longer threads of burlap fiber out to overlap the sides and hang off the edges of the tag a bit...
It ends up looking nice and irregular with some extra space between the fibers...so you can just go back and add some of the shorter pieces of burlap to fill in the gaps while adding little drops of liquid glass as you do...
Walla!
The egg shape I used is also found on the Cricut Art Philosophy Cartridge.
Did you hear you can get this cartridge for FREE this month? Did you hear you can actually get over $425 worth of amazing CTMH products and business supplies for only $99??? It is all true! There are no strings attached at all to join my Close to My Heart team this month! Whether you are looking to build a business from home or just build a collection of amazing products for a great discount, you are welcome to take advantage of this limited time offer! You can actually choose any of the three Close to My Heart exclusive Cricut cartridges for FREE when you purchase the New Consultant Kit pictured below for just $99 with $15 to ship it out. THAT'S IT! No commitment, no strings! Of course, I would LOVE to help you get off the ground running with your very own business, but the choice is yours. :) Team Been There, Blinged That is growing and would love to have you! I really don't want you to miss this opportunity, so if you are interested, follow this link HERE for way more details! If you have already made up your mind, then click HERE to join me and choose your FREE Cricut Collection! :)
Monday, September 16, 2013
These are a Few of My Favorite Things!
Hello, Heart 2 Heart fans! Team Sunset is back on duty this week with a challenge that YOU are not going to want to miss!
This week's challenge is all about My Favorite Things! Woooooo hoooo! Interpret this one however you like, but as soon as I saw it, I headed for my shimmer trim and glitter paper! These, you see are two of MY FAVORITE things to use when creating cards or paper projects!
I have a few other FAVORITE Close to My Heart products thrown in here, so let's see if you can spot them! I decorated the cover of my NEW My Creations Kraft 3-ring Binder! Christmas is another one of my favorite things, you see, so this was an easy crafty decision. ;) I am going to turn this 8 x8 binder into a place to keep our Christmas cards we receive each year.
Did you spot another of my favorites? Yep--chevrons! I used the Ruby Chevron Ribbon to decorate this sparkly gift box all wrapped up. The tag and white overlay on the gift are cuts from another of my favorite things--my Close to My Heart Cricut Cartridges!!! Sparkles on the tag, yep--another fave!
Here is the shiny fabulousness of the Green Glitter Paper...I really had to use it! Know what I like best about it? All the shimmer of glitter without the mess! :)
A row of banners and snowflakes adorn the top edge of the binder. Strips of shimmer trim in silver and red alternate with Pear and Lagoon CS (yep, two of my favorite CTMH colors!)
I {heart} The Sound of Music! I have since I was a kid watching it with my family that one day a year it was on TV. To go along with the song (and my overall theme, what-do-you-know?) I added some snowflakes from my favorite line, "snowflakes that stay on my nose and eyelashes!"
Some of the snowflakes are embossed with silver, and some are stamped in Lagoon and Whisper Ink with images from the Snowflakes and Frosted Workshop on the Go Cardmaking Kit My Acrylix stamps. See all the bitty sparkles?
I had SUCH a wonderful time combining all my favorite Close to My Heart Products into one project for this challenge!
I really cannot wait to see how you interpret this one. Will you go with the age-old song lyrics for your project? Will we see cream colored ponies or raindrops on roses? Will you choose YOUR favorite things??? Can't wait to find out, so come and play with us over at Heart 2 Heart soon!
Thursday, September 5, 2013
The Perfect Pinterest Inspired Wedding Gift
I can't believe it has already been a week since I attended a very special wedding. One of the "kids" I used to babysit for in college married his High School sweetheart, and it was such a beautiful sight! After I was finally able to drown out the sound of my hubs whining about the start of college football that day (huh?), I was swept away into memories of days gone by...WAAAAAY BY! ;)
Anyhow, as I prepared for this big event, I recalled a project that a friend had begged me to make that she had seen on Pinterest (thanks, Kate!) I found lots of different versions to browse through, so I was able to locate a cute tree cut on my cricut carts and make a version of my own!
I am not quite sure what you would call this, but I refer to it as "the Wedding Tree" now. The tree is cut on a beautiful script B&T Duo paper in the For Always Paper Packet with the Wall Decor and More Cricut Cartridge. I altered the image in the Cricut Craft Room to make it just right.
I punched the hearts out on some beautifully textured Bazzill CS that was JUST the perfect shade of "madly in love" red. The newlyweds' initials are printed on the hearts...
I hope Jon and Monica treasure this as a reminder of that special day in August when their two hearts officially became one (and my heart officially felt old!) :)
I also grabbed my silver glitter paper, bitty sparkles, and Monogram C stamp from Close to My Heart and blinged up the ribbon on the package!
It is so great to have these supplies on hand at times like this! No need to run anywhere but my scrap room! ;)
Sunday, August 25, 2013
Lunchbox Notes with Laughing Lola for Back to School Sparkle
Hi everyone! Like I said on Monday, my kiddos started back to school last week. A new school year calls for new lunchbox love, so I made some cute little cards with my Laughing Lola Paper Packet to put in their lunches.
I am linking these cutie pie lunchbox notes up with My Creative Time's newest challenge to make something for back-to-school time! :)
These 3x3 cards didn't take long at all to put together, but the payoff was huge! My daughter loved this one on the right that I sent in her lunch. I was afraid she was too old for this, but I think the pattern paper and bling combined to make her day a little less stressed with some love from home.
Unfortunately there was one snag...she asked me what the chocolate chip meant, lol! I had to tell her it was a Hershey's Kiss! Can you tell which one my kids see more of at home, lol?
I used one of my all time favorite stamp and die sets from MCT for the kiss and the little tag. I had just discovered not too long ago that the wafer dies will actually cut through the glitter paper like butter with my Big Shot! SOOOO easy. I used the perfect stamp for the sentiment from a new Close to My Heart My Acrylix stamp set called School Years. In a moment of pure inspiration, I also spied the stamp with the glasses...and realized they fit the Kiss perfectly! :)
I used a retired Classmate Alphabet for this sentiment, but you can use practically any that is the right size! I recommend this CTMH Pennant Alphabet which has a simple font very similar to the one I used.
Why not send some sparkle in YOUR child's lunchbox tomorrow? You never know when a loving word from home will hit the spot! ;)
I will share my version of this lunchbox note with the Babycakes Paper Packet later this week, so be sure to sign up for email updates! Thanks for stopping by! :)
I am linking these cutie pie lunchbox notes up with My Creative Time's newest challenge to make something for back-to-school time! :)
These 3x3 cards didn't take long at all to put together, but the payoff was huge! My daughter loved this one on the right that I sent in her lunch. I was afraid she was too old for this, but I think the pattern paper and bling combined to make her day a little less stressed with some love from home.
Unfortunately there was one snag...she asked me what the chocolate chip meant, lol! I had to tell her it was a Hershey's Kiss! Can you tell which one my kids see more of at home, lol?
I used one of my all time favorite stamp and die sets from MCT for the kiss and the little tag. I had just discovered not too long ago that the wafer dies will actually cut through the glitter paper like butter with my Big Shot! SOOOO easy. I used the perfect stamp for the sentiment from a new Close to My Heart My Acrylix stamp set called School Years. In a moment of pure inspiration, I also spied the stamp with the glasses...and realized they fit the Kiss perfectly! :)
Here is the inside of the card...
Why not send some sparkle in YOUR child's lunchbox tomorrow? You never know when a loving word from home will hit the spot! ;)
I will share my version of this lunchbox note with the Babycakes Paper Packet later this week, so be sure to sign up for email updates! Thanks for stopping by! :)
Monday, August 19, 2013
Hugs and Sparkly Kisses
It is a late-night craft-a-thon! I have been feeling the mojo like crazy tonight, which is a good thing since my kids start school again tomorrow! Nothing like a good distraction...
Anyway, I wanted to play along again with Freshly Made Sketches #99 because this week they had a fantastically simple little CAS sketch. JUST what I needed! You will soon see why my late night crafting must come to an end though, lol...stay with me, this is worth it! ;)
I used the Close to My Heart Laughing Lola Purple and Black CS for this card along with some silver glitter paper (I KNOW!)
Here is the sketch...
These adorable Hershey kisses and stamps are from a stitched die set from MCT. Yummy and cute at the same time! The Laughing Lola CS is embossed with the Cuttlebug Hugs and Kisses folder from Provocraft. It has become one of my favorites!
This is a great, but unfortunately retired My Acrylix stamp that I used on the inside of the card. It was available only in the For Always Workshop on the Go Scrapbooking Kit from CTMH.
Now, because I am making and posting this up so late, I accidentally did it AGAIN and put the front of my card on backwards...sigh. I was going to perform a front-of-card-ectomy, but I decided that my Aunt might actually get a good laugh out of this one if I leave it as is. ;) I sure would appreciate any prayers for her you could whisper right now as she recovers from a delicate surgery and awaits test results. Thanks, my sparkly friends!
Thursday, August 15, 2013
What's Black and White and Stamped All Over?
My latest card!!! Hee, hee!
I was so inspired by THIS amazing card by fellow consultant Wendy Coffman, that I just had to get my butt moving and make one similar, but with a whole new spin on the sentiment!
I have always been intrigued by the way the letters H and I fall next to each other in the alphabet...
I am linking this version of my card up with the My Creative Time Black and White Challenge.
The sentiment is ABSOLUTELY the focus of this card. I stamped it using the Close to My Heart Framework Alphabet My Acrylix set in White Daisy Pigment Ink on Black CS. I adore this new alphabet that mimics the chalkboard look perfectly. It also coordinates with our new M size stamps as well. The polka-dot trim at the top and bottom is made from a zip strip in the For Always Paper Packet. Then, whammo, this sparkly glitter button from the Mini Medley Accents Black Collection catches your eye!
To add some interest inside, I stamped the main sentiment again in black for the opposite effect...
Now to re-focus on that sparkly "HI" sentitment. Did you think we finally had white glitter paper from CTMH? NOPE! Not yet anyway, lol. I tried to choose between chalking it in and filling it with glitter, and settled for BOTH! I used my White Chalk Marker to color in my Silver Glitter Paper! :) I wanted to stay true to the black and white challenge, so this option was both innovative, sparkly, AND allowed! ;)
OK, so just for fun, I used some leftover cuts and my Peachy Keen faces to transform my card into a FANTASTIC welcome card to give my daughter's teacher when we visit her classroom tomorrow night. What do you think?
I think it will be a hit! :) THIS version of my card is linking up with the the Heart 2 Heart Sentimant-ally Yours Challenge for August. It was my DT's week off, but I could not resist playing along!
I was so inspired by THIS amazing card by fellow consultant Wendy Coffman, that I just had to get my butt moving and make one similar, but with a whole new spin on the sentiment!
I have always been intrigued by the way the letters H and I fall next to each other in the alphabet...
I am linking this version of my card up with the My Creative Time Black and White Challenge.
The sentiment is ABSOLUTELY the focus of this card. I stamped it using the Close to My Heart Framework Alphabet My Acrylix set in White Daisy Pigment Ink on Black CS. I adore this new alphabet that mimics the chalkboard look perfectly. It also coordinates with our new M size stamps as well. The polka-dot trim at the top and bottom is made from a zip strip in the For Always Paper Packet. Then, whammo, this sparkly glitter button from the Mini Medley Accents Black Collection catches your eye!
To add some interest inside, I stamped the main sentiment again in black for the opposite effect...
Now to re-focus on that sparkly "HI" sentitment. Did you think we finally had white glitter paper from CTMH? NOPE! Not yet anyway, lol. I tried to choose between chalking it in and filling it with glitter, and settled for BOTH! I used my White Chalk Marker to color in my Silver Glitter Paper! :) I wanted to stay true to the black and white challenge, so this option was both innovative, sparkly, AND allowed! ;)
![]() |
FYI--it is hard to take a pic of yourself coloring! ;) |
OK, so just for fun, I used some leftover cuts and my Peachy Keen faces to transform my card into a FANTASTIC welcome card to give my daughter's teacher when we visit her classroom tomorrow night. What do you think?
I think it will be a hit! :) THIS version of my card is linking up with the the Heart 2 Heart Sentimant-ally Yours Challenge for August. It was my DT's week off, but I could not resist playing along!
Monday, August 5, 2013
Bon Voyage from the Heart
Hi everyone! Wow, the last few weeks have been some tear-jerkers around here, and my project today sure reflects it! I am not trying to be a downer at ALL, so suffice it to say that my oldest child is a senior this year in high school. It has truly just started to hit me as we seriously look at college applications.
When I saw the assignment for the Bon Voyage Heart 2 Heart Challenge, my emotions took over completely. It is truly a Bon Voyage from the heart. I made a card for my daughter in preparation for her college departure. It's only a year away, you know! ;)
Oh my, did the tears start flowing! Can I just tell you that while I was making this very card, a certain song came onthe radio my iTunes playlist that has proven to be a timeline of sorts for the hubs and I. It is called, "There Goes My Life," by Kenny Chesney...and I bawled like a baby at one of the last lines that has just about made this our REAL LIFE story. Here it is:
"She had that Honda loaded down.
With Abercrombie clothes and 15 pairs of shoes and his American Express.
He checked the oil and slammed the hood, said you're good to go.
She hugged them both and headed off to the West Coast."
*So sorry for the tangent! Keep reading while I grab some kleenex!*
I started with the trendy NEW Sarita Paper Packet for a background pattern. My daughter has chosen several new shirts with patterns similar to this for her current wardrobe, and has some of her favorite colors, so I figured it was a safe choice.
Next, I had already imagined a Polaroid for this one...and the NEW Artbooking Cartridge does not disappoint in that department! Pg. 49 of the handbook has an adorable cut with the word HUGS at the bottom--the perfect negative space to fill with something glittery! ;) I decided to cut a double fish-tailed banner out of the dark grey glitter paper to back it with.
These cute little packages are found on pg. 86 of the Artbooking handbook. They are meant to be birthday presents with a bow on top, but my handy dandy micro-tip scissors took care of that! ;) I had to play around withe the sizes to get it just right for the size of my outdoor denim car stamped from the Fast and Furious My Acrylix. The cute little tires are black buttons with a hole-punch of glitter paper on them for hubcaps! Girly hubcaps. ;)
OK, I have controlled the tears again just in time to let you know it is YOUR turn to come up with a project that features Heart 2 Heart's first August Challenge--Bon Voyage! What is your vision of Bon Voyage? All you have to do is use mostly Close to My Heart products to create your project, and link up with us over at Heart 2 Heart to play along! See you there!
When I saw the assignment for the Bon Voyage Heart 2 Heart Challenge, my emotions took over completely. It is truly a Bon Voyage from the heart. I made a card for my daughter in preparation for her college departure. It's only a year away, you know! ;)
Oh my, did the tears start flowing! Can I just tell you that while I was making this very card, a certain song came on
"She had that Honda loaded down.
With Abercrombie clothes and 15 pairs of shoes and his American Express.
He checked the oil and slammed the hood, said you're good to go.
She hugged them both and headed off to the West Coast."
*So sorry for the tangent! Keep reading while I grab some kleenex!*
I started with the trendy NEW Sarita Paper Packet for a background pattern. My daughter has chosen several new shirts with patterns similar to this for her current wardrobe, and has some of her favorite colors, so I figured it was a safe choice.
Next, I had already imagined a Polaroid for this one...and the NEW Artbooking Cartridge does not disappoint in that department! Pg. 49 of the handbook has an adorable cut with the word HUGS at the bottom--the perfect negative space to fill with something glittery! ;) I decided to cut a double fish-tailed banner out of the dark grey glitter paper to back it with.
These cute little packages are found on pg. 86 of the Artbooking handbook. They are meant to be birthday presents with a bow on top, but my handy dandy micro-tip scissors took care of that! ;) I had to play around withe the sizes to get it just right for the size of my outdoor denim car stamped from the Fast and Furious My Acrylix. The cute little tires are black buttons with a hole-punch of glitter paper on them for hubcaps! Girly hubcaps. ;)
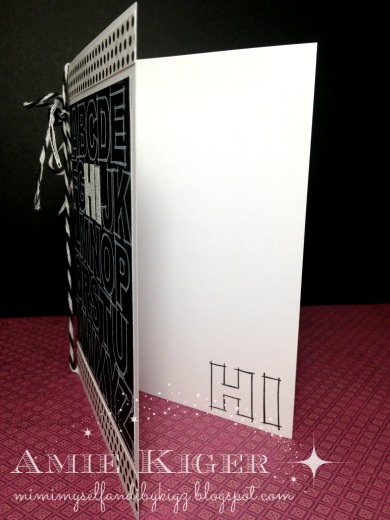
The inside sentiment is from an older set called Princess Wings that is still available on my Close to My Heart Shop because it coordinates with one of our Cricut cartridges (right now, all Cricut coordinating stamps will always be available for purchase on the website.) I have had it forEVER, but never had the right moment to use it--until now! It is the perfect college bound, Bon Voyage wish! Did you notice that I used the negative cut from the polaroid on the front of the card? :)
Subscribe to:
Posts (Atom)