Well, officially I am a couple of days late with this wish, hahaha...but when you get busy crafting, you are sometimes late. ;)
I got together with some old and new customers at my friend's house to create this easy-peasy layout inspired by the Close to My Heart Seasonal Expressions Idea Book...
I just love that I can use the layouts featured in our catalogs to create a bit faster and easier...
I also ADORE the new Worshops Your Way instructions that include ways to add more photos to your layout with these new page protector sizes!
Using Thin Cuts is just one way to create some easy embellishments on pages...
Zip strips are another way to add some coordinated pattern and color...did you know they come on every 12 x 12 pattern paper in the paper suites? They do!
I used the following Close to My Heart supplies for this page...
You can STILL get this amazing paper wreath project for FREE on my website for two more days! Just fill your cart with $60 of products from your wish list, and then you will be prompted to add it for FREE!!! You can buy as many as you want for just $18.95 too! :)
Welcome to 2017...and welcome National Papercrafting Month!!!
I briefly introduced you to this GEM of a kit that you can actually get for FREE this month! It is called the Welcome Home Wreath Kit from Close to My Heart. Here's mine all finished...
I absolutely love it sooooooooo much more than I ever thought I would! It was super easy to punch out the floral parts and assemble it with my trusty Liquid Glass. No hot glue gun required, so no worries!!! Here are a few close ups...
I added a new Gold Glitter Gem to the center of each rose and on each side of the "Welcome" banner.
Sea. Glass. Glitter. Paper. Boom.
Now for some tips and tricks to use if you want to assemble one of these beauties yourself!
1. It took me a good 4 hours to really personalize mine the way I wanted. I inked the edges of most of the papers. Do it! If you do--ink everything FIRST! I used Topiary Ink on the truest green leaves and petals,New England Ivy on the rose leaves, and Fern Ink on the rest of the greenery. The blue flowers petals I edged with a light hand in Peacock Ink--yep I know, pretty dark! I love the contrast, but you could go lighter with Glacier for a more subtle effect. Your fingers will be very inky, so wash your hands really well before assembly too--do NOT touch those white roses after inking--curl them FIRST and hide them, lol, or make sure your fingers are good and clear of smudging ink on them. Actually, just roll them first!
Look at the difference in the petals of the succulents both inked and non...
2. Add glitter if you like! I ended up adding layers of my gorgeous Sea Glass glitter paper to the blue flowers...and it was super easy! I just used the empty punch outs as a stencil to trace on the back side of the glitter paper...then cut them out! These cuts are also available on the Flower Market Cricut Cartridge, but I only wanted to cut a few, so this was way faster and conserves the glitter paper.
The glitter paper is pretty thick, so I peeled off that back layer to let the petals curl more easily later...
3. Add the twigs and leaves as you go...not at the beginning! Better yet, lay it all out like I did before you start gluing anything to the hoop...flowers first, making sure you know which ones are layered over others, then see where you want to add the other greenery and twigs. Place your banner so you know where you would like it to be as well--before you attach anything! After I knew I liked the arrangement, I took a picture for reference. I glued the large white rose on first and kind of made my way out from there.
If you can't wait to get your hands on one of these kits there are 4 great ways to do that! Three of those ways get it to you FREE!!!! You can purchase the kit on my website for just $18.95. You can get it for FREE along with a $60 order, OR earn it free as a Hostess when your party reaches level 2 in sales, OR you can get one FREE when you join my team this month!!! Now the only question left is, how are you going to snag one? :)
Here is a GREAT little video to show you the kit assembly!
You really do need to pinch me to get me to believe that it is really 2016, but I am quite sure that there are a few of you pinching yourselves as well. As I get older, the one thing that doesn't change is that time keeps marching on at a faster pace every. single. year.
The GOOD thing about that is the change in our Close to My Heart Stamp of the Month 12 times a year! It's pretty hard to be creatively bored, lol. This month, we have a lovely little set just begging for some layered stamping! Meet my new friend, Beloved Bouquet!
I have another little friend to introduce you to as well...because January is National Papercrafting Month! We celebrate this one CTMH style with the Live Your Day Picture My Life cards available for one month only!
Every month, Close to My Heart offers a special My Acrylix set that is ONLY available for purchase during that month. It can be purchased at the full retail price of $17.95 OR if you add $50 worth of products to your shopping cart over on my website, you can add it to your cart for just $5!
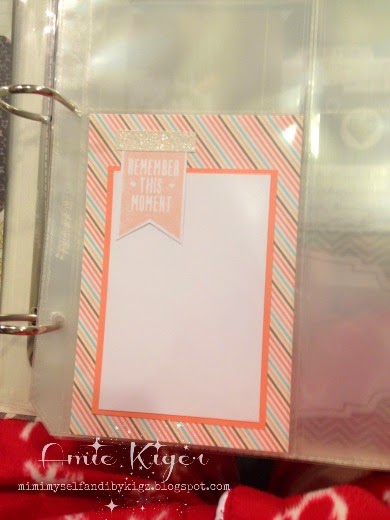
This month, we look ahead to Valentine's Day with the love themed This Moment My Acrylix:
I combined BOTH the images from This Moment and the Year Noted National Papercrafting Month Kit to create some journaling boxes for my upcoming pages...
This is not orange! It is more of a pinkish than an orange--it just happens to be one of those colors that ends up impossible to edit, lol. I stamped the image in Sorbet Ink twice so this would be a lighter, second generation image. (I am a bit more tolerant of Sorbet these days, lol.) It is one of the CTMH inks that matches nicely with these papers. Also, did you catch the bit of NEW White Shimmer Trim? :)
Here are some other pics so you can see everything that comes in the Year Noted Kit, starting with a picture of the closest matching inks...
I like Lagoon as a darker complementary color.
These 4x6 cards fit perfectly into the Picture My Life pockets! The kit comes with 2 sheets.
You get a light blue, light pink, and two White Daisy 12x12 sheets of CS. The pattern on the back sheet of paper is the reverse side of the 4x6 cards. THIS is the best pic of the pinkish hue...
GOLD foil stickers are totally on trend right now!
Here is yet another reason to celebrate in January!
How many of you are trying for a simple, faster way of scrapping your memories this year? I know I am, because, I have a LOT of pics to catch up with right now! This adorable Year Noted Kit comes ready to help you do JUST that! You can read all about it over on the Close to My Heart Blog, Make It from Your Heart right now for lots of great ideas. It also complements Close to My Heart's fantastic line of slip-in photo protectors and products called Picture My Life. Take a peek...
What do you think? Here is all you need to know in black and white:
"During the month of January, with a qualifying purchase of $50, you are eligible to purchase the exclusive Year >> Noted
paper kit (which has a retail value of over $24 USD / $27 CAD for only
$5—that’s over 80% off retail! Or, for an additional $5, you can order
the Year >> Noted paper kit with an accompanying My
Creations™ kraft mini book. The paper kit for both options includes a
C-size stamp set, stickers, cardstocks, and B&T Duos™ papers, all
specially designed to coordinate with the My Creations™ kraft mini book
so you can have a yearlong scrapbooking experience. This means you will
receive over $34 USD / $37 CAD worth of product for only $10 if you
purchase the kit with the accompanying mini book! But the fun doesn’t
end there—included on the sticker sheet, you will find a large golden
seal. Once the year is done and all the pages are filled, seal up your
book and create a mini time capsule that you can open years from now.
Remember, this deal is only available for January, so make sure to get
your own Year >> Noted paper kit today for the perfect start to a crafty year!"
I've got some first hand looks at these products for you as well in the days to come, so stay tuned! See the deal over on my website HERE!