Showing posts with label Cricut Explore. Show all posts

Friday, August 25, 2017

End of Summer Blog Hop

Wait, WHAT!?!?!  Didn't summer just start about a week ago?

I promise I won't start whining (even though I WANT to) because you probably came over from Stephanie's Blog looking for something crafty, lol, NOT to join in on a pity party.  Soooo, before my tantrum starts, here you go!

Last week was the start of another school year for me (so long, summer, sniff), and I saw a FANTASTIC piece of art shared on a friend's Facebook wall that featured a teacher's prayer that I had never heard.  By the end of the looooong first week, I NEEDED to create it for daily inspiration.  Here's my take on it and the link to the original piece of art.


original artwork doodle by Stephanie Ackerman
You might recognize the retired Close to My Heart Chalk It Up paper I used in this artwork...it's really perfect for "teacher stuff."  I used the Marker Alphabet set to stamp the title in Ruby, Tangerine, Lemon, Willow, Lagoon, Pacifica, Pansy, and Blossom.  I also used Jennifer's Hand for the word "prayer" and the Handwritten Print Alpha for the "a."

Now, my original vision of this project involved me stamping most of the prayer, but I quickly came to my senses and designed the rest of the prayer on Design Space for the Cricut Explore.  I used a few different cartridge fonts including Artistry, A Child's Year, and two Creative Memories fonts. 


I changed all of the fonts to "write" and duplicated the words I wanted to cut so I could also cut them by setting them to cut lines again.  I was quite ecstatic to find that the cricut pen was alright with me using my ShinHan markers to fill in some of the words--it didn't bleed at all.

The images and dies from the School Kids set were PERFECT for this project!

Well, of COURSE I used some red glitter paper!  ;)
I added a few other tidbits from various Fundamentals line products like the Adventure Ribbons  and two retired complements packs.


I hope you found some inspiration here, but for now you are off to Kelly's Blog to see what she's been up to this summer!


Here's the entire lineup for our little blog hop in case you get lost as you drown in your summer's end tears...


Friday, July 7, 2017

Amazing Dan and Phil Birthday Card!

Hello!  THIS is the moment we crafty cardmakers LIVE for...you know what I am talking about...that moment when you have the PERFECT card idea for that special someone!!!  It only happens once in a while for me so I am especially excited to share this one.

This birthday card is for my niece--who happens to be a HUGE "phan" of YouTubers Dan and Phil.  If you are too, you may get it right away...and if not, I am truly sorry.  Lol!


This card is based off the wickedly popular book that Dan and Phil wrote called, "The Amazing Book is Not on Fire."


I am not a "phollower" of theirs so that is all I know, lol.  I just happened to be paying attention at the right time in the right place.  ;) Moms have to be sneaky like that...always paying attention.  I also had a bit of help from my girlie who is also a "phan." 

I designed all the lettering on the front of the card using Design Space for my Cricut Explore.  Then I chose the colors from my Close to My Heart Cardstock palette.  The inside is randomly stamped with the candle image from the Close to My Heart Sweet Birthday Stamp set.  Ok, so it wasn't very random...I'm a bit of a control freak.  ;)

The sentiment is from the Workshops Your Way Let's Party Cardmaking Kit.  I love this versatile sentiment that you can either leave as is or color in!

I just want to add that my girl exclaimed, "MOM!  This is the most AMAZING card EVER!!!!!" when she laid eyes on it.  That is all.  For. The. Win.

Happy Birthday, Miss Mia!!!!!!


Monday, February 13, 2017

A Sweet Sale for Valentine's Day!

I just love making Valentines for people, and I sure love a sweet sale too!  Today I get to tell you about BOTH! 

First off, I just got word that there will be a 30% off sale on select amazing and wonderful current products over on my Close to My Heart website starting on Valentine's Day!


The sale starts at 4pm CST on February 14th and runs for a full 24 hours or while supplies last, so hurry on over to get the best selection! 

Next up, let me show you how I made these SWEET little valentines for my kiddos at school...


Can you believe I WROTE and CUT them out on my Cricut Explore machine using the heart image and written font on the CTMH Flower Market Cartridge?  YEP!  It is really pretty easy to design your own incredible projects in the Cricut Design Space software.  I have a little animal eraser in each of the goodie bags for the kids at school.  I also put some ADORABLE little Minion Dry Erase Board erasers in the rest of the bags I made up for my colleagues!  I can't wait to give them out!

What did YOU do for your valentines this year?

Are you ready for Easter?  ;)


Monday, June 20, 2016

Mermaid Monday Take 2!

I thought I would squeeze in another quick episode of "Mermaid Monday" before the day gets away from me.  Between home inspections and negotiations, my head is spinning and I need a craft break today even if it is just to share a past creation.  :)

Last month I made a great little card from THIS beautiful artwork I found on Pinterest.


It was not too difficult to use the PIN to create the Little Mermaid using a combination of buttons, sparkles, and sequins from my stash, and I absolutely loved the final result!

The custom sentiment was written by my trusty Cricut Explore...


I wish I could take credit for any of this beautiful card, but the sentiment idea came directly from the awesome mother of the recipient!  Isn't it perfect!!!  :)

Have you guys had any Pinterest wins lately? 

Monday, May 23, 2016

Mermaid Monday

This post is a little late, but it IS still Monday (as I type), right?  Summer finally arrived today and the kids needed to eat, lol, so I was a bit distracted! 

I made this "do not disturb" sign as a request from a special customer for her daughter's birthday.  It was going to be hung on the birthday girl's front door to ward off any interruptions to her crafty time!  (What a GREAT MOM!!!!)  :)

Anyhow, I was absolutely tickled with how it came together--even better than I originally imagined!  I can finally share it since the day has passed, lol!

The Close to My Heart Zoe paper packet has a houndstooth pattern that worked beautifully as mermaid scales along with Glacier, Lagoon, and Crystal Blue CS, and some Teal Glitter Paper.  The Champagne CS is the best peachy flesh-tone I have found, so I cut the door hanger on it using the Cricut Art Philosophy Cartridge.

Now, a bit more about those scales...they were another PERFECT creation with the CTMH Thumb Notch Punch!   Remember the Minions I made HERE?  SO many uses for this bad boy...


I used my Cricut Explore to write the sign (my customer thought of the PERFECT wording!) and cut out the seashells...

I colored some retired Rosette Ribbon with my Peacock ShinHan Marker for a nice finish to her tail.

Yes, yes, that IS a little bellybutton, HAHAHAHAAAAA!  She needed to have one!  I just LOVE it when a plan comes together!  :)
While supplies last!

Only in May!

Only in May for National Scrapbook Month!

Friday, March 13, 2015

Welcome Baby Fox!

Finally Friday!  I am getting super-excited about a few things this month...and I cannot wait to share them with you! 

The first thing, is this DARLING little card I made for my upline, Mandy, who had a cutie-pie little baby boy recently.  His name is Fox, and I seriously could not resist making her a card with his namesake as the centerpiece.  Lucky for me the Cricut Artfully Sent Cartridge created by Close to My Heart has JUST the right image!  :)  (And for those of you who played along with my Facebook game yesterday, it gives you the answer to my question!) 


The beautiful birch trees on this overlay style card had me at hello for sure!  But the sweet little fox was just the right addition to welcome the little guy!  It was so easy to create by cutting all the parts on my Cricut Explore Machine from ProvoCraft.  I cut everything on my CTMH White Daisy CS.  This is a great little sneak peek at one of the brand new products coming in April!  The Glacier Extra Thick Baker's Twine is soft and thick. 


I used the Cute Koalas My Acrylix Stamp Set for the stamped images on the front and inside of the card in Glacier Ink.


I also added a sheet of acetate packaging to the back side of the birch trees.  I wanted to make it really stable with the twine tied around them.


The inside scene was created with a bit of masking, a bit of sponging, and a hint of Sunset Chevron Washi Tape behind the little fox.  This is how easy it was...


Here is the code to use for the sweet label shape I used on the front of the card...Narelle has an entire list of ALL FOUR CTMH Cricut cartridges (and others) coded for easy searching in Design Space!  Thanks, sooooooooooooo much, Narelle!  You can find her Close to My Heart Cartridge Explore Codes at www.thenon-craftycrafter.blogspot.comHERE is the direct link to her page with the codes.


Want to get this card-maker's DREAM of a cartridge?  You can get it from your favorite Close to My Heart Consultant...ME!~  Lol, I hope!  ;)  Now is the perfect time to place an order on my website though, because I am kicking off my 3rd anniversary celebration with Close to My Heart with a Mystery Hostess giveaway!  For every $25 you spend on the amazing CTMH products, your name is entered the drawing to win the hostess rewards for my orders in March!   Can you say, FREE PAPERS, INKS, STAMPS, and BLOCKS???  They could all be yours!  Just place your order over at my website HERE before April 7th, and start making your wish list today!  :)


Wednesday, February 25, 2015

Washi Wednesday Meets #jrlcreativechallenge

I am so excited to share this washi project today...It has been on my brain's backburner FOREVER, but I finally got motivated and actually made it with the latest #jrlcreativechallenge -- getting creative with WASHI!

Washi is a super thin tape, so it doesn't add much bulk to your paper.  That means it will ALSO run through your Cricut machine stuck to CS!  :)

My first step was to design my cuts in Cricut Design Space so I could see exactly where on my paper to put the washi tape.  I used the following images from the Close to My Heart Artfully Sent Cartridge: the Celebrate Card (M10113C) sized at a 5 inch height, Pocket Card (M100F7D) sized at a 6 inch height, and Envelope #11 (MEF85D) sized at an 8.65 inch height.


After you save your design, click the GO button to view your mats.  This will show you exactly where to place your washi on a piece of CS.  In this case, I decided to go all out and washi the whole 9 x 12 CS!  :)


Here's a quick tip--go slowly when unrolling washi!  It is super-thin, so likes to come off before you are fully ready for it to rip sometimes.  Luckily, it is also easy to piece back together--bet you can't tell very easily where I had to!  ;)

I used my Non-Stick Micro Tip Scissors to trim the washi.
Next, place your CS on the cricut mat and cut away!

Another use for washi!  Holds your CS to your mat!  ;)


I decided to use just the letters for my first project.  I placed them roughly in the same places as they were on the cutting mat to align the washi lines...the black CS really made the colors POP!


A few silver sequins as embellishments, and I was done!  :)


Be sure to come back tomorrow to see what I did with the rest of the washi cuts!  :)

Here is a list of all the CTMH washi I used...

Honey Triangles
Silver Geometric
Ruby Chevron
Topiary Striped
Lagoon Hearts (cut in half lengthwise)
Sunset Chevron (cut in half lengthwise)


Stamp of the Month--last week to get yours!

Only a few more days for BOGO 50% OFF! 

Tuesday, February 17, 2015

Cricut Mat Tip for Tuesday!

Hey there, my friends!  Just a quick tip to share with you today, but it is a goodie! 

I recently went a little wild bending my Cricut mat to remove some CS cuts quickly, and the unthinkable happened...it cracked! 


It was rather cool in my basement craft cave, so I can't say it was any fault of the mat.  I was in a bit of a time crunch, and in shock to say the least, so I did what any good crafter would do--grabbed my packing tape!  ;)

I placed my paper on the mat as usual (to cover the stickiness), flipped it over, and placed the packing tape carefully over the crack and around to the other side without covering the sticky surface or the paper.  I made sure it was firmly against the side of the mat to be sure to fit through the guides on my Explore. 


And it WORKED!!!  I was absolutely thrilled! 

Just wanted to share this in case you guys run into the same problem sometime!  :)

BOGO 50% OFF in February!

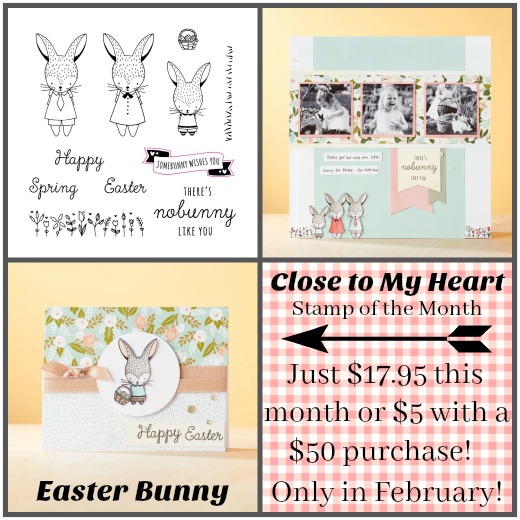
Stamp of the Month for February! 

Monday, January 26, 2015

Using Negative Cricut Cuts on Your Scrapbook Pages

Goooooooood MORNING!  I am extremely upbeat and chipper today!  Don't hold it against me because I am typing this on Sunday, not Monday, lol!  ;)

Anyway, I showed my Facebook fans a sneaky peek of this fantastically easy layout that I made by using the part of my Cricut cut that I would normally discard--the negative.  Follow me on Facebook HERE to see more sneak peeks like this one.

I cut out a bunch of circles with my Cricut and was left with this...
I am a keeper, let me tell you...so as I was tossing it out, that little voice popped out and whispered, KEEP IT!  Use it!  I have learned to listen to that little voice, my friends!  ;)

I carefully evened up all the edges, and used it to make a cute little beach layout with the Seaside Paper Packet and the Paper Fundamentals Whimsy Collection...


Here comes that gold polka-dot vellum from the retired Free to Be Me Kit...I am down to just a little bit left, gasp!


This is what the White Daisy CS looked like on the back as I was using my ATG to adhere the little squares of paper and the pics...


It was really easy, and I think it makes a BIG statement! 

Year Noted is available in January ONLY!

Available to help support Operation Smile through March!

Stamp of the Month for January ONLY!