Hello my sparkly friends! It is a double post kind of day again...what can I say, I am a fly-by-the-seat-of-my-pants type of crafter. You just never know when I will be inspired or find a great challenge to try! ;)
This project is for the Peachy Keen Stamps Challenge that ends tonight. Egads! We are to create a 3D project with a pet theme. Before I started, I found out that My Craft Spot's Monday Challenge 109 was a 3D challenge as well! I was super-excited since I JUST received some stamps from Kimberly to play with! Woot-woot a two-fer!
Most of my Peachy stamps are faces, so I knew I wouldn't be stamping a pet. I browsed my Cricut handbooks for a change instead...and saw a bone! Inspiration struck, and here is what I put together...
It is a treat pouch for canine trick-or-treaters! I used the Sarita Paper Packet from Close to My Heart for the background paper. The black CS scalloped trim is made with the NEW Scallop Border Punch.
How cute is that little doggie bone wearing a witch hat? One of my favorite things about Peachy faces is that you can bring any item to life instantly. :) I cut this bone at 1.25 inches on Champagne CS from the Create a Critter Cartridge. Then I used face parts from both Everyday Character Face Parts and Basic Paper Doll Faces to bring it to life. To accentuate the Halloween theme, I added this adorable witch's hat!
The hat is from a retired Close to My Heart My Acrylix called Wicked. It usually looks like this:
I changed it up a bit to be more simple and cheery (read: no spider, lol.) My favorite addition is the green glitter paper band! Save your scraps--you never know WHAT you might use them for!
Anyhow, I really wanted to play with my new Stampin' Around Fall stamps and the dies that go along with it. I used my White Daisy, Black, and Sunset CS to add this little sentiment to the pouch. I added the white circle after tying on the button with twine and popped it up with foam squares. :)
See that doggie bone pattern paper behind it? I don't own a single piece of dog themed paper (no dog!), but I made it all my myself with the retired A Bowwow from CTMH. It is SO easy to make your own pattern paper! Have you ever tried it?
Thanks for stopping in to see my latest creation! If you know some pooches that would like a treat pouch like this one, email me at mimimyselfandi@outlook.com and I will hook you up!
Never let ANYONE dull your sparkle! Self admitted Cricut fanatic and Shimmer Trim addict. ;)
Showing posts with label Buttons Black Assortment. Show all posts
Wednesday, August 21, 2013
Sunday, July 7, 2013
Celebrating with Mojo Monday 300!
Hi everyone!!! I am sooooo glad to be back in my scrap room after a wonderful trip out to WA state for a family reunion. I'll share some pics a little later, but I really needed to bust a move and get my Mojo Monday 300 entry blogged and linked! They are having some amazing giveaways over there to celebrate, so check it out if you can whip up a card in a few minutes...lol, sorry, but I am totes last minute on this one! (My pre-teen taught me that word--totes--it is apparently hip and short for totally, but only when used correctly...huh?)
Anyhow, here is my entry and the gorgeous 300th Mojo sketch!
I fell in love with this sketch immediately...and even knew which stamp sentiment I was going to use from looking at it just once. :) That strong square in the front was begging for the Close to My Heart Be Still My Acrylix stamp. I also wanted to use the gorgeous round stamp from Love Doily in place of the circle in the sketch.
This flower is made from some retired CTMH blooms in Tulip and Creme Brulee. They are the perfect accent colors for the black and white papers. A black button with black sparkle grounds the flower to the rest of the black tones. Black shimmer trim fishtail flags instead of green leaves keep the monotone in the background nicely.
Now, lets take a look at this skinny little border that I added as per the sketch. I didn't think faux stitches would work with the overall feel of this card. I opted instead to use the zip strip from one of the B&T duo papers from the For Always paper packet where I found these black and white patterns.
I carefully trimmed the sides from this zip strip....and used my bonding memories glue pen to adhere it nicely to the card. LOVE the way this looks...it reminds me of a ball chain or a zipper. :)
I added dimension to the layers on my card as well. What would I ever do without my foam squares? Actually, I don't want to find out, so it is time to order more! ;) I used a 5x7 card base for this one since my sentiment was so large...I forgot to mention that! ;)
Thanks for coming in to see my Mojo Monday 300 entry! Hey, did you know that this month Close to My Heart is running a super special! In case you wanted to check out any of the supplies I used for this card, you can also get the Workshops on the Go Canvas Art Kit for HALF PRICE!!! You read that right, for this month only, you can get this fantastic kit for only $19.95!!! There is no other purchase required to get this fantastic deal, so check it out! :) Better hurry, because when they are gone, or when July is over, they are history! Here is a pic...but it doesn't show the stamp set that is included!
Anyhow, here is my entry and the gorgeous 300th Mojo sketch!
I fell in love with this sketch immediately...and even knew which stamp sentiment I was going to use from looking at it just once. :) That strong square in the front was begging for the Close to My Heart Be Still My Acrylix stamp. I also wanted to use the gorgeous round stamp from Love Doily in place of the circle in the sketch.
This flower is made from some retired CTMH blooms in Tulip and Creme Brulee. They are the perfect accent colors for the black and white papers. A black button with black sparkle grounds the flower to the rest of the black tones. Black shimmer trim fishtail flags instead of green leaves keep the monotone in the background nicely.
Now, lets take a look at this skinny little border that I added as per the sketch. I didn't think faux stitches would work with the overall feel of this card. I opted instead to use the zip strip from one of the B&T duo papers from the For Always paper packet where I found these black and white patterns.
I carefully trimmed the sides from this zip strip....and used my bonding memories glue pen to adhere it nicely to the card. LOVE the way this looks...it reminds me of a ball chain or a zipper. :)
I added dimension to the layers on my card as well. What would I ever do without my foam squares? Actually, I don't want to find out, so it is time to order more! ;) I used a 5x7 card base for this one since my sentiment was so large...I forgot to mention that! ;)
Thanks for coming in to see my Mojo Monday 300 entry! Hey, did you know that this month Close to My Heart is running a super special! In case you wanted to check out any of the supplies I used for this card, you can also get the Workshops on the Go Canvas Art Kit for HALF PRICE!!! You read that right, for this month only, you can get this fantastic kit for only $19.95!!! There is no other purchase required to get this fantastic deal, so check it out! :) Better hurry, because when they are gone, or when July is over, they are history! Here is a pic...but it doesn't show the stamp set that is included!
Tuesday, June 18, 2013
You Had Me at Chevron!
So, I was doing my usual run through FB morning routine when I saw the next Atlantic Hearts Challenge sketch. The chevron background stopped me in my tracks. Well, yeah, of course I can do that!
There has actually never been a more perfect set-up, because the remnants from my previous craftiness was still spread out over my workspace...and it fit PERFECTLY!!! I just dug out my favorite paper with a chevron pattern from the Close to My Heart For Always Paper Packet, and trimmed out the background...I was done in record time with this little cutie! :)
Here is the sketch:
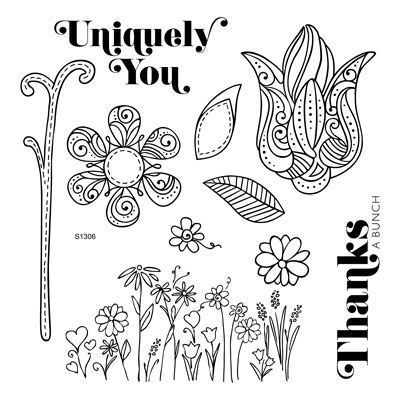
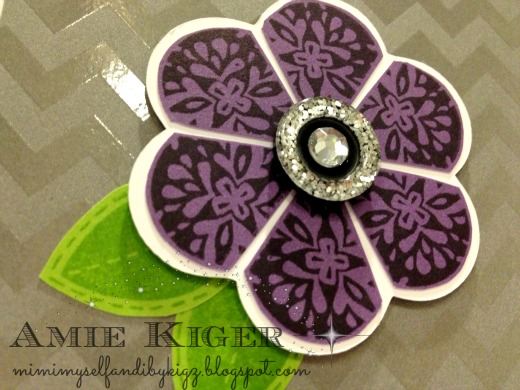
The June Stamp of the Month has turned out to be a wonderful addition to my stamp collection. I stamped this flower in Smoothie Ink on Smoothie CS, and the leaf in Topiary Ink on Topiary CS, inking the edges as well. These black glitter buttons remain one of my favorite embellishments. The little bit of Hemp tied in the middle is a great touch with the gold flecks in the chevron paper.
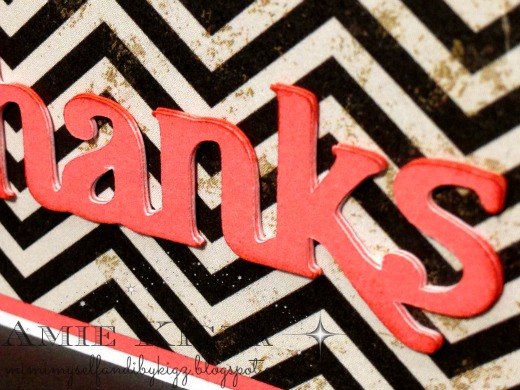
I love the sentiments included on this stamp set too, but they would not have shown up on the bold chevron background. I decided to solve this by cutting the word, "thanks," from the Cricut Artiste Cartridge instead. I actually used a great layering trick that I have seen before on cards. I cut it three times in Smoothie CS and layered them to stand out more. LOVE the effect with a bit of Smoothie Ink on the edges for emphasis.
So glad this all came together in a flash so I could link up again with this challenge! :)
Remember, the June Stamp of the Month won't be available for long--when June is gone, so is it! Check it out here on my website for the amazing price of $5 with any other $50 purchase! Just fill your cart with your wishlist and then you will be prompted to add the stamp at the discounted price. It's that easy! Of course you can always buy this set at the regular price of $17.95 during the month of June!
Look for more artwork on my blog using this stamp set later this week! :)
There has actually never been a more perfect set-up, because the remnants from my previous craftiness was still spread out over my workspace...and it fit PERFECTLY!!! I just dug out my favorite paper with a chevron pattern from the Close to My Heart For Always Paper Packet, and trimmed out the background...I was done in record time with this little cutie! :)
Here is the sketch:
The June Stamp of the Month has turned out to be a wonderful addition to my stamp collection. I stamped this flower in Smoothie Ink on Smoothie CS, and the leaf in Topiary Ink on Topiary CS, inking the edges as well. These black glitter buttons remain one of my favorite embellishments. The little bit of Hemp tied in the middle is a great touch with the gold flecks in the chevron paper.
I love the sentiments included on this stamp set too, but they would not have shown up on the bold chevron background. I decided to solve this by cutting the word, "thanks," from the Cricut Artiste Cartridge instead. I actually used a great layering trick that I have seen before on cards. I cut it three times in Smoothie CS and layered them to stand out more. LOVE the effect with a bit of Smoothie Ink on the edges for emphasis.
So glad this all came together in a flash so I could link up again with this challenge! :)
Remember, the June Stamp of the Month won't be available for long--when June is gone, so is it! Check it out here on my website for the amazing price of $5 with any other $50 purchase! Just fill your cart with your wishlist and then you will be prompted to add the stamp at the discounted price. It's that easy! Of course you can always buy this set at the regular price of $17.95 during the month of June!
Look for more artwork on my blog using this stamp set later this week! :)
Friday, May 31, 2013
Damask Divas Tommy and Later Sk8ter Blog Hop!
Hi everyone! I am so excited to participate in another blog hop with my teammates! This month we have chosen to use either Tommy or Later Sk8ter for our projects. I was not sure which to go with, but settled on Later Sk8ter since it is more fun to type the name! ;)
If you came from Mandy's Blog you are on the right path, but if you need to check out the order or start at the beginning, please refer to the Damask Divas Blog HERE.
I decorated this $1, 4 x 6 (picture size) wooden frame for my Dad with the wonderful blue hues of Sk8ter. :) It is purely coincidence that the picture matches the papers, because I found it AFTER I finished the frame! Seriously though, I am not a bit surprised as all my projects seem to have a bit of the "NO WAY" factor to them, lately lol. Here is my fabulous frame for my birthday! OH, I mean Father's Day (same day this year!) I was actually born on Father's Day, and as the oldest of those three stunning females in the picture, I am the reason my dad got to celebrate that Father's Day! ;) We get to celebrate together again this year! :)
I used Mod Podge to attach the paper to the wooden frame. When I traced it to fit, I flipped it and the paper upside down like this to get the shape right...
Next, I sanded the edges in a downward motion with my sanding kit to get it even with the edge of the frame.
My dad has a blue truck and LOVES to grill! (AND he doesn't have internet, so my blogpost is safe!) I just so happened to have the perfect Close to My Heart My Acrylix stamp sets to embellish my frame, C1542 Perfect Fit - Dad and D1541 Fast and Furious.
Let's start at the top with the Outdoor Denim Chevron Ribbon.
I made a little award ribbon using The Perfect Fit - Dad My Acrylix, the 2 inch scallop punch, my liquid glass, and a couple of CS circles...I am a visual learner, so I made up a little picture tutorial for you!
It was easier than I thought it would be to snip off the tines of the brads with my scissors. I used an OLD pair though, not my micro-tips! I pushed the sharp ends back into the head of the brad, inserted a foam square, and used liquid glass to attach it to the flat side of the button. ;) Here is a pic of what I did...
I decided to use one of the zip strips in the Later Sk8ter Packet to frame out the picture. I like how it adds some more interest and color to the frame.
I hope you have a good time on our hop today! There will be a lot of beautiful artwork to take in, so take your time! I'll put a list of all the fabulous CTMH products I used to make this at the bottom if you would like to duplicate it. ;)
Your next stop along the hop is Traci's Blog. Can't wait to see the rest of the projects myself!
If you get lost at all, you can always find the complete list of Divas participating in this month's hop on the Damask Divas website HERE. :)
Happy Hopping!
Shopping List:
Wooden Frame
Mod Podge
Later Sk8ter Paper Packet
Fast and Furious My Acrylix
Perfect Fit - Dad My Acrylix
Buttons Black Assortment
Silver Brads
Outdoor Denim Chevron Ribbon
Outdoor Denim, Lagoon, Cocoa, and Black Exclusive Inks
Cricut Artiste Collection
Color Dare #45 Is a DREAM {pop}
Happy Friday again! :)
Let's get right down to business, shall we? I love any excuse to use my Dream Pop papers, so when I got the assignment to use it for the Color My Heart Color Dare this week, I went crazy! :)
I wanted to make a project for two other challenges, Rose Blossom Garden's Birthday Girl key challenge and the H2H Creature Feature challenge, so I combined all three into a glitzy little tag for the birthday girl!
I used a combination of my favorite papers from the Dream Pop packet, starting with the last of my grey chevron paper. You can also see the shimmer of Close to My Heart's Glitter Paper peeking out from the bottom layer...
Since this tag is ALL GIRL, I wanted to sneak in as much sparkle as possible. I used the Cotton Candy Sparkles and Glitter Glitz Startdust Gel on the little butterfly. I created antennae for him with black waxy flax. If you haven't used waxy flax yet, you simply MUST! ;) LOVE that stuff!
The Slate Polka-Dot Satin Ribbon was the PERFECT touch for this tag. I added a button from the Buttons Black Assortment as well.
I think that is a tag fit for a princess, don't you? :)
TAG! You're it! Now it is your turn to create something with your Dream Pop papers to show US! Link up with us at the Color My Heart Color Dare and you could be the winner of our prize this month, the Pirouette My Acrylix Stamp! You could also be the next designer to display the Color Dare Diamond award on your blog, so come and play with us! ;)
TODAY is the very last day to order Dream Pop!!! She will be gone after today, I am afraid, so get your $35 order in on my website and pick one up for only $10!!! While supplies last or until May is over!!! Click HERE to go get yours!
Last day for this adorable Stamp of the Month too!!! Only $5 when you add another $5 in product to your Dream Pop order!!! Run! :)
Let's get right down to business, shall we? I love any excuse to use my Dream Pop papers, so when I got the assignment to use it for the Color My Heart Color Dare this week, I went crazy! :)
I wanted to make a project for two other challenges, Rose Blossom Garden's Birthday Girl key challenge and the H2H Creature Feature challenge, so I combined all three into a glitzy little tag for the birthday girl!
I used a combination of my favorite papers from the Dream Pop packet, starting with the last of my grey chevron paper. You can also see the shimmer of Close to My Heart's Glitter Paper peeking out from the bottom layer...
Since this tag is ALL GIRL, I wanted to sneak in as much sparkle as possible. I used the Cotton Candy Sparkles and Glitter Glitz Startdust Gel on the little butterfly. I created antennae for him with black waxy flax. If you haven't used waxy flax yet, you simply MUST! ;) LOVE that stuff!
The Slate Polka-Dot Satin Ribbon was the PERFECT touch for this tag. I added a button from the Buttons Black Assortment as well.
I think that is a tag fit for a princess, don't you? :)
TAG! You're it! Now it is your turn to create something with your Dream Pop papers to show US! Link up with us at the Color My Heart Color Dare and you could be the winner of our prize this month, the Pirouette My Acrylix Stamp! You could also be the next designer to display the Color Dare Diamond award on your blog, so come and play with us! ;)
TODAY is the very last day to order Dream Pop!!! She will be gone after today, I am afraid, so get your $35 order in on my website and pick one up for only $10!!! While supplies last or until May is over!!! Click HERE to go get yours!
Last day for this adorable Stamp of the Month too!!! Only $5 when you add another $5 in product to your Dream Pop order!!! Run! :)
Thursday, May 16, 2013
Dream Pop Tangerine!
I have absolutely lost my mind. Not really, but I am definitely on a roll! Here is another card combining the bright, bold colors of the Close to My Heart Dream Pop Paper Packet with the versatile Just for You My Acrylix Stamp set.
Isn't it amazing how many different ways you can combine these two? :) This Tangerine color just pops right off the Kraft CS. I love the leaves stamped in Black Ink this time on the Pear CS. The beautiful sentiment is found on the Beautiful Friendship My Acrylix Stamp set also from Close to My Heart.
The bling sure seems to balance out the plain background nicely on these cards. Not that you would EVER need an excuse to add some sparkle! ;)
Thanks so much again for coming by to see another creation! Your comments are sparkle to my ears! ;)
Isn't it amazing how many different ways you can combine these two? :) This Tangerine color just pops right off the Kraft CS. I love the leaves stamped in Black Ink this time on the Pear CS. The beautiful sentiment is found on the Beautiful Friendship My Acrylix Stamp set also from Close to My Heart.
The bling sure seems to balance out the plain background nicely on these cards. Not that you would EVER need an excuse to add some sparkle! ;)
Thanks so much again for coming by to see another creation! Your comments are sparkle to my ears! ;)
Wednesday, May 15, 2013
Dream Pop Goes Gypsy Just for You
Hi everyone! I have been having WAYYYY too much fun with this Dream Pop paper! It should really be outlawed at this point...or maybe I should just be banned from spending another $35 to get another pack? NO WAY! Lol...
Anyhow, I am over-the-top about using the Just for You My Acrylix with these papers, and here is my latest version!
I am really loving this grey chevron paper as a background, so I mixed it up with some Gypsy CS for a completely stunning look. The leaves are done in Pear Ink Stamped on Pear CS. Black Shimmer Trim, a black glitter button, and a large Sparkle all add to the elegant feel of the card.
Thanks for coming in to see! I am linking this one up to the H2H May Flowers Challenge. Go check it out! Also, for the first time, I am linking up to Dynamic Duos Challenge Blog for their choose an old combo challenge! I don't have the exact colors, so chose our similar CTMH colors in the bold and sassy shades of these. :)
Don't forget that the Dream Pop paper promotion won't last forever! When the paper is gone, it's gone! If it lasts for the entire month, then the last day to get yours will be May 31st!
Anyhow, I am over-the-top about using the Just for You My Acrylix with these papers, and here is my latest version!
I am really loving this grey chevron paper as a background, so I mixed it up with some Gypsy CS for a completely stunning look. The leaves are done in Pear Ink Stamped on Pear CS. Black Shimmer Trim, a black glitter button, and a large Sparkle all add to the elegant feel of the card.
Thanks for coming in to see! I am linking this one up to the H2H May Flowers Challenge. Go check it out! Also, for the first time, I am linking up to Dynamic Duos Challenge Blog for their choose an old combo challenge! I don't have the exact colors, so chose our similar CTMH colors in the bold and sassy shades of these. :)
Don't forget that the Dream Pop paper promotion won't last forever! When the paper is gone, it's gone! If it lasts for the entire month, then the last day to get yours will be May 31st!
Monday, April 8, 2013
My Five Faves! #5 Buttons Black Assortment
Hi everyone! I am starting a little blog series today called My Five Faves! I will show you my five favorite things in any given category, and you can share yours too! Are you ready? The first list I came up with is My Five Fave CTMH Embellies! Today, we start with #5 and work our way up to #1!
My Five Fave Embellies #5 >>> Buttons Black Assortment
There are sooooo many ways to use these adorable buttons, and the sporting a bit of glitter have my name all over them! Here is just one of the many ways I have used them.
This has got to be one of the most fun little gift boxes to make. It was super easy to put together after my Cricut Expression 2 did all the cutting for me! ;)
I used my Close to My Heart Cricut Artiste Cartridge to cut out this little purse on page 31 from my Lagoon Cardstock. It is cut at 3 inches, and assembles to a three inch height. This was the perfect size to hold the necklace my daughter wanted to give her BFF. :)
Here is where a added one of those black glitter buttons! I added a purple sparkle to the middle of this one and attached it with a glue dot to the purse.
Beneath the button, under the flap, I attached the useful hook and loop dots that Close to My Heart now carries. These are super-useful to not only keep the purse closed, but also in allowing the darling little bag to be used again and again! I love the tiny size, but they sure do grip.
Check out the sparkly strap! I used a roll of Reflections glitter tape from my stash and LOVE the way it stands up. You could also use our shimmer trim in silver or black, but I had specific instructions for this little number...
...can you guess the recipient's favorite colors? Her breathless little gasp upon seeing it was all I needed to hear. Spreading the sparkle seems to fill MY bucket with a little more sparkle too! ;)
What is one of YOUR favorite embellishments?
Speaking of sparkle spreading, you can find the Cricut Artiste Collection HERE for a special price this month from me!
My Five Fave Embellies #5 >>> Buttons Black Assortment
There are sooooo many ways to use these adorable buttons, and the sporting a bit of glitter have my name all over them! Here is just one of the many ways I have used them.
This has got to be one of the most fun little gift boxes to make. It was super easy to put together after my Cricut Expression 2 did all the cutting for me! ;)
I used my Close to My Heart Cricut Artiste Cartridge to cut out this little purse on page 31 from my Lagoon Cardstock. It is cut at 3 inches, and assembles to a three inch height. This was the perfect size to hold the necklace my daughter wanted to give her BFF. :)
Here is where a added one of those black glitter buttons! I added a purple sparkle to the middle of this one and attached it with a glue dot to the purse.
Beneath the button, under the flap, I attached the useful hook and loop dots that Close to My Heart now carries. These are super-useful to not only keep the purse closed, but also in allowing the darling little bag to be used again and again! I love the tiny size, but they sure do grip.
Check out the sparkly strap! I used a roll of Reflections glitter tape from my stash and LOVE the way it stands up. You could also use our shimmer trim in silver or black, but I had specific instructions for this little number...
...can you guess the recipient's favorite colors? Her breathless little gasp upon seeing it was all I needed to hear. Spreading the sparkle seems to fill MY bucket with a little more sparkle too! ;)
What is one of YOUR favorite embellishments?
Speaking of sparkle spreading, you can find the Cricut Artiste Collection HERE for a special price this month from me!
Thursday, February 28, 2013
Color Dare #32 Gets Stuck in the Muck
Happy Thursday to you! It's time for another Color Dare! This week we are showcasing the three Close to My Heart colors Pear, Lagoon, and Outdoor Denim.
Alright, how many of you have launched yourselves head-first into a project or craft only only to find yourself come to a screeching halt? (This is where you all humor me and raise your hands, or give up a sassy, "Mmmm HMMM!") ;) Well, THAT, my friends is what happened to me this week! I thought I knew exactly what I was doing with this design, but unfortunately the two cuts from the Artiste Cartridge that I thought went together like peanut butter and jelly, well, they were actually more like peanut butter and ketchup, lol. Thanks to the wonderful encouragement of the Color My Heart bloggess Sarah, though, the project came together after all! Here is the finished product...
I had everything embellished by the time I realized that the Outdoor Denim colored card shape was NOT an envelope sleeve for the other cut! I am not sure why I didn't realize it before, lol, but I sure didn't. Here is the page in the handbook with the cuts...just so you don't think I am crazy... ;)
Sarah suggested I upload a photo so she could help "unstick" me from my design dilemma. It is a good thing too, because she pointed out the simplest thing to me that would save the whole design (thanks, Sarah!) :) Whew! Instead of using the entire card shape of the Outdoor Denim shape (yeah, it's not a sleeve, it's a card all on it's own) I simply needed to cut off the back and attach it to the front instead of using it as the sleeve that it was never meant to be, lol! It worked out great too! If you ever get stuck on a project, be sure to ask someone for an opinion before you scrap it! ;)
I bet you thought these colors were from Later Sk8r, right? Well, guess what? The Zip Strip from the Chantilly Paper Packet matches it spot on! All I had to do was change the little dots from pink to white with my gel pen! ;)
Here it is when you open it up...I trimmed a picture of the girls being silly at the zoo to give to Grandma in this beautiful little presentation.
Here is my creative formulary for this wonderful little tuck card. (I made up the name, isn't it fitting? You tuck the end of the paper up under the little flap to close it.)
Cricut Artiste Cartridge
*Provocraft Expression 2 Cricut Cutting Machine
Whisper, Outdoor Denim, and White Daisy Cardstock
Chantilly Paper Packet Zip Strip
*White Gelly Roll Pen
Lagoon and Outdoor Denim Exclusive Inks
D1506 Family Love My Acrylix Stamp
D1546 Frame Flair My Acrylix Stamp
Silver Shimmer Trim
Satin Polka Dot Ribbon
Black Button Assortment
Paradise Assortment Baker's Twine
Now it's YOUR turn! Get crafty with these three colors along with any neutrals you choose, and link up to the Color My Heart Color Dare! We can't wait to see what you come up with! :)
Alright, how many of you have launched yourselves head-first into a project or craft only only to find yourself come to a screeching halt? (This is where you all humor me and raise your hands, or give up a sassy, "Mmmm HMMM!") ;) Well, THAT, my friends is what happened to me this week! I thought I knew exactly what I was doing with this design, but unfortunately the two cuts from the Artiste Cartridge that I thought went together like peanut butter and jelly, well, they were actually more like peanut butter and ketchup, lol. Thanks to the wonderful encouragement of the Color My Heart bloggess Sarah, though, the project came together after all! Here is the finished product...
I had everything embellished by the time I realized that the Outdoor Denim colored card shape was NOT an envelope sleeve for the other cut! I am not sure why I didn't realize it before, lol, but I sure didn't. Here is the page in the handbook with the cuts...just so you don't think I am crazy... ;)
Sarah suggested I upload a photo so she could help "unstick" me from my design dilemma. It is a good thing too, because she pointed out the simplest thing to me that would save the whole design (thanks, Sarah!) :) Whew! Instead of using the entire card shape of the Outdoor Denim shape (yeah, it's not a sleeve, it's a card all on it's own) I simply needed to cut off the back and attach it to the front instead of using it as the sleeve that it was never meant to be, lol! It worked out great too! If you ever get stuck on a project, be sure to ask someone for an opinion before you scrap it! ;)
I bet you thought these colors were from Later Sk8r, right? Well, guess what? The Zip Strip from the Chantilly Paper Packet matches it spot on! All I had to do was change the little dots from pink to white with my gel pen! ;)
Here it is when you open it up...I trimmed a picture of the girls being silly at the zoo to give to Grandma in this beautiful little presentation.
Here is my creative formulary for this wonderful little tuck card. (I made up the name, isn't it fitting? You tuck the end of the paper up under the little flap to close it.)
Cricut Artiste Cartridge
*Provocraft Expression 2 Cricut Cutting Machine
Whisper, Outdoor Denim, and White Daisy Cardstock
Chantilly Paper Packet Zip Strip
*White Gelly Roll Pen
Lagoon and Outdoor Denim Exclusive Inks
D1506 Family Love My Acrylix Stamp
D1546 Frame Flair My Acrylix Stamp
Silver Shimmer Trim
Satin Polka Dot Ribbon
Black Button Assortment
Paradise Assortment Baker's Twine
Now it's YOUR turn! Get crafty with these three colors along with any neutrals you choose, and link up to the Color My Heart Color Dare! We can't wait to see what you come up with! :)
Thursday, February 7, 2013
Color Dare #29
Welcome back to another Color Dare! I hope you weren't frightened by last weeks' color concoction, because this week is all about the color of LOVE! We would LOVE for you to join us! Our color combo this week is Blush and Cranberry. How could I NOT make a valentine? I really enjoy the combination of pink and gray, so I added the neutral colors black, slate, and whisper.
I reached for my cricut scrap cuts first and found some flowers and this awesome torn-out paper cut from the Cricut Artiste Cartridge. I just love this one! I pulled out my new Girls Rock My Acrylix set and got to work.
This heart squiggle boarder stamp was perfect for the paper doodles. I added some of our Cranberry Baker's Twine and a new button from the Black Button Assortment. I did type that correctly--there are both black and gray buttons included in this new assortment. Some of them have GLITTER! ;)
Next were the flowers. One of them was exactly the cut for this large flower stamp from the set. The others didn't fit exactly, but I thought the stamps would give them some great details even if they didn't match up exactly. I added foam tape for some layered effects, and some new Pink Glitter Gems and black shimmer trim to bling them up too.
The leaves are stamped in Slate ink on Whisper Cardstock.
For the "Love" sentiment, I used the generational stamping technique. I stamped it first in Cranberry ink at the bottom, and then without re-inking, stamped two more times up the paper. I absolutely love how you really have more than one color to play with for each ink pad you have! :)
You have until Thursday the 14th (Valentine's Day!) to link up with us at the Color Dare to play along, so why not give it a try? I can't wait to see what you come up with! :)
I reached for my cricut scrap cuts first and found some flowers and this awesome torn-out paper cut from the Cricut Artiste Cartridge. I just love this one! I pulled out my new Girls Rock My Acrylix set and got to work.
This heart squiggle boarder stamp was perfect for the paper doodles. I added some of our Cranberry Baker's Twine and a new button from the Black Button Assortment. I did type that correctly--there are both black and gray buttons included in this new assortment. Some of them have GLITTER! ;)
Next were the flowers. One of them was exactly the cut for this large flower stamp from the set. The others didn't fit exactly, but I thought the stamps would give them some great details even if they didn't match up exactly. I added foam tape for some layered effects, and some new Pink Glitter Gems and black shimmer trim to bling them up too.
The leaves are stamped in Slate ink on Whisper Cardstock.
You have until Thursday the 14th (Valentine's Day!) to link up with us at the Color Dare to play along, so why not give it a try? I can't wait to see what you come up with! :)
Subscribe to:
Posts (Atom)


You .jpg)
.jpg)