Showing posts with label Harvest Baker's Twine. Show all posts

Tuesday, May 13, 2014

You're the Best Masculine Birthday Card!

One of the reasons for my case of the May Crazies is a flurry of birthdays.  My brother-in-law is a self-employed home improvement guru, so I knew JUST what I was going to do for his card when I found the You're the Best My Acrylix stamp set from Close to My Heart.


These tool images are PERFECT for a random stamped background!  I used Chocolate Exclusive Ink on Kraft for this one...


These hinges are a long retired CTMH product that I found in my stash.  I love how they angled themselves when I added some baker's twine across the back! 


The wood grain pattern in the Timberline Paper Packet was an instant favorite.  I used the "happy" and "day" from a sentiment in You're the Best to fashion a birthday sentiment with the amazing Framework Alphabet


What elements do YOU like to include in a masculine card?


Monday, September 23, 2013

Color Dare Reminder and a New Record!!!

Get your creations in for this week's Color Dare by Thursday the 26th at NOON!

I just whipped this little CAS card up in 40 minutes FLAT!!!!  If you know me, you realize this is a totally record-breaking moment, lol!  I am celebrating by linking it up to CAS-ual Fridays CFC115 and the Color My Heart Color Dare right NOW!  ;) 


I used two fantastic Close to My Heart My Acrylix stamp sets for this one:  Cityscape and Perfect Fit Thanksgiving.  I simply (no pun intended....ok, so yeah, it is intended) ADORE this sentiment--"give thanks" in that petite little font.  Isn't it amazing?  The Olive Twine is from the Harvest Baker's Twine Assortment, and I cut that tiny tag from the Cricut Art Philosophy Cartridge.  :)

Can you see the sparkle that I HAD to add to the tree leaves?  Gotta love that Glitter Glitz!  This color is the Almond variety.


I used the three challenge colors and then used the neutrals Champagne, Colonial White, and Cocoa.

I am sooooooo in love with the CAS style right now!

ALSO!!!  In case you read an earlier post about my Aunt who has been battling some health issues, I wanted to let you know that this card is for her--after so many weeks, she is HOME!!!!  The docs are optimistic that they removed all the cancer, and she is eating her way back to her old self!  Praise God for all He has given and provides...give thanks!  :)

Monday, May 20, 2013

One Page Layout without My Cricut?

I wasn't sure if I could actually pull this off to tell you the truth!  I have a gathering coming up where we will be making a scrapbook layout.  Some of the guests are new to scrapping and have never seen a cricut, so I don't want them to run away screaming just yet, lol.  The hostess and I decided to keep it on the down-low and Cricut cut free.  :)

One of the Close to My Heart videos on the Consultant Website inspired me to come up with the following page, and I really love it!


I used Buttercup CS for the base.  The two pics are 4 x 6 matted next to each other on White Daisy with a 1/8 inch mat.  The banner cuts are made with a 2 inch scallop circle punch on White Daisy and a 1.5 inch circle punch on Twilight.  They are folded over a strand of Baker's Twine and adhered with Bonding Memories glue.  I stamped the little flower from C1536 Happy Thoughts My Acrylix from Close to My Heart.  All the patterned papers are from the Chantilly Paper Packet.


This cute journal box is a 1.75 x 2.75 inch rectangle of White Daisy that I cut on my trimmer and used a stamp from D1524 Frame It Up My Acrylix.  I popped it up with foam squares for dimension.  I {heart} dimension!  ;) 

The last hand-made element on this page is the scallop boarder on the White Daisy cardstock at the bottom.  I did this with my corner edger all along the edge of the paper, and it was so easy! 


I am so proud of myself for making a cricut-free layout for a change!  It sure won't stop me from using mine all the time, but it is good to know that I can still do it all by myself, and show my customers who don't have a cricut how to make fabulous pages!  :)

Friday, May 17, 2013

A Scrapbook Layout for Color Dare #43

I have fallen a bit behind in my goal this year to make a layout a week.  I think I have completed four, so don't bother with the math.  ;)  I decided to put my Color Dare Design Team duties to work for me this week by completing a layout towards my goal...um, yeah, lol.

Our colors for Color My Heart's Color Dare #43 are Cranberry, Honey, and Outdoor Denim.  Totally Tommy!  I headed for my craft room to see what pics I had next in my stache...um, I mean stash!  No Mustaches in this post, lol!  ;)

I love the way this one turned out, even though *gasp* there is no bling!  It just didn't fit with the layout theme, lol.  But I love it anyway.  :)  I do know the pic is a bit large, but it was way to small at another size, so I went with this...


One of the stars of my layout besides the challenge colors, are the Milepost Shapes corrugated cardboard embellishments.  They are ON SALE right now on my website!  ONLY $1 nets you 48 shapes like the ones I used!  I also used the Scholastic and Tommy Paper Packets.  I had a lot of fun with this journal box.  I layered some vellum over the B&T paper from Tommy and used my Crop-O-Dile to chomp some holes down the side to run the Cranberry Baker's Twine through.  I just don't like the way adhesive shows through vellum, so this was a nifty solution!


I sprinkled images from another of the Tommy B&T papers all over the layout.  There are many different ones to chose from, and I cut them each by hand with my Micro-Trim Scissors.  The little wooden arrows are form the Color-Ready Trinkets Wooden Shapes.


Love the faux Washi on the B&T Duos in Scholastic!  I trimmed this one out and roughed it up to add to the pic.


The Keyboard Kraft Alphabet is quickly becoming a favorite of mine.  There are so many letters included that I might never run out! 


I hope my layout has inspired you to try this color combo!  Did you happen to notice that they are the primary colors?  ;)  

I wonder if you also notice what I left OUT of this layout?  Any guesses?  If you are the first person to guess correctly in the comments, follow my blog, and follow me on FB (link is at the top right,) then you will win your very own pack of Milepost Shapes!  You must have a mailing address in the US to win, please.  Join in the fun and tell me what I left OUT of this layout!  :)

Then, it is your turn!  Use your Close to My Heart Colors Cranberry, Honey, and Outdoor Denim or some similar substitutes to craft up a project of your own to link up with the challenge this week!  Remember to stick to the color combo for the challenge only adding your choice of NEUTRALS!  You can read up on the rules HERE in the sidebar before you start!  :)  Happy Crafting!

Wednesday, August 1, 2012

Damask Divas August Blog Hop!

Welcome to my blog!  Today I am part of the Damask Divas August Blog Hop.  We are showcasing the fabulous new Paper pack, Avonlea from Close to My Heart.  If you came from Cydney's page, you are in the right place.  If you have jumped here and just discovered our blog hop, feel free to check the list at Damask Divas to find out where you are in the order.

I had stumbled upon an adorable little mini book project in one of my facebook groups recently, and decided to make one for the blog hop.  The embellishments that coordinate with Avonlea lend nicely to the overall effect.  Here is the video that tells how to make the simple 3 x 3 book with just one piece of paper.  Just click on the one that says "valentine mini book" in the lower left corner of the page.  Tim really makes it easy to duplicate, and then the rest is all up to your imagination!  Without further adieu, here is my take on the one sheet mini album:


This was a super-fun and easy project that looks sooooo beautiful and polished when completed.
I just HAD to use the new Shimmer Trim to adhere the binding of the book.  It is a self-adhesive ribbon that was very easy to work with.  I used the strip of paper off the Avonlea B&T Duos for the middle of the spine.  The glittery medalion is from the Slate Mini-Medley Accents, as well as the button in the center.  Also, the two small bling are from the Sparkles Assortment--round--black and grey.


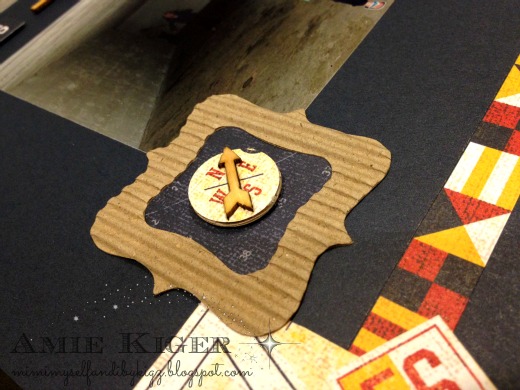
I had been wanting to use the Vintage Type Alphabet and this was the perfect opportunity.  It really went well with the old style feel of the papers and colors.  I also added Milepost Shapes throughout the mini book and distressed them with Chocolate or Slate Ink.


This is the first pull-out from the two pockets I kept for my version of the book.  You can see the foundry clip and a pin from the new Slate Mini-Medley Accents.  I also used a bit of the AWESOME new Burlap Ribbon we have now!  I LOVED the effect with the pin!


These are another brand new and exciting product--the Color-Ready Canvas Alphabet.  I inked the letter U in Slate and left the ME in the original color to make it pop.


Another newbie!  Olive Baker's Twine from the Harvest Baker's Twine collection!  Also, the new Sparkles assortment--Round--brown and tan!


This page is one of my personal favorites in the book--love how all the floral came together.  The two metal pieces and flower on the right are from the New Antiqued Gold Mini-Medley Accents.  The one on the left is a Pewter Badge Button adhered to a piece from the Avonlea Canvas Compliments.


Now you can see the second pull out from pocket number two.
 

The final page...more accents from the Slate Mini-Medley.


What a great way to use those old school pictures that sit around after you pass them out to the relatives!  Or maybe the relatives will get lucky and get a beautiful little mini book to treasure their pictures in.  ;)

Thanks for stopping in and checking out the Damask Divas first EVER Blog Hop!

From here, you get to visit Crissy Worthen!  Have a great time discovering all the great ways you can use this beautiful Avonlea Paper!  If you get lost, just pop on over to Damask Divas Blog for directions.  Thanks for stopping by!