Ho, Ho, Ho! Welcome to the December edition of the Damask Divas Blog Hop! This month we are showcasing our gorgeous Reds and Greens of the Pear and Partridge Paper Packet just in time for Christmas. If you came from Mandy Leahy's Blog, then you are on the right path!

I decided to make decorations for my Christmas Wreath with the different B&T Duos from the Pear and Partridge Paper Packet. I have been wanting to make poinsettias for this wreath since last year, and with the proper motivation of a blog hop, I finally did it!

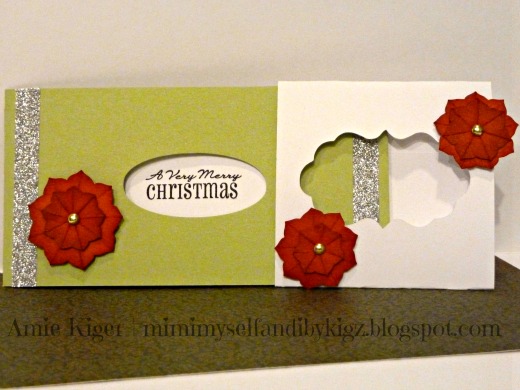
All of the shapes for the decorations were cut from the Close to My Heart Art Philosophy and Artiste Cartridges. For the first poinsettia, I layered different sized flower cuts on Cranberry Cardstock and a red patterned B&T Paper from Pear and Partridge using foam tape. I also added a layer of White Daisy which is actually a snowflake cut. I stamped an image from the Snowflake My Acrylix Stamp Set in Cranberry Exclusive Ink (dye ink.) The center is fastened with a gold Shimmer Designer Brad. These brads will be retiring next month, so get them while you can!

I dotted the points with Almond Glitter Glitz for some added sparkle and shine.

I made these two other poinsettias as well using the same supplies. The leaves were super-fun to make and are another pattern paper from Pear and Partridge. I used a stylus to "draw" the veins on the leaves, and then I colored over the impressions with my Ponderosa Pine and Olive Alcohol Markers to give it some depth.

I love how the foam tape placed at the outer edges of the petals gives the flowers more "POP!" I sponged Cranberry Ink onto the edges of all the petals as well.


I also wanted to use other decorations on the wreath, so I strung up this pair of mittens. This striped B&T (Background and Texture, in case you were wondering what that stands for...) is also in the Pear and Partridge Packet and looked great as a knit pair! They have Shimmer Trim on the cuffs, and a cute little snowflake adorned with a big, clear sparkle on the body. A length of Olive Baker's Twine holds them together.

What to do about a bow??? OF COURSE! Our new Burlap Ribbon was the perfect choice for added visual interest. I used liquid glass to form three 18" loops, and then wrapped a short piece around them in the middle. The liquid glass is THE best adhesive to keep bigger embellishments in place. After it dried, I attached it to the wreath with some thin wire.

One more space remained, so I decided to hang an ornament shape with more Baker's Twine for balance. The image is also from the Snowflake My Acrylix and stamped in Cranberry Ink after cutting the coordinating shape on my Cricut Expression. O Shimmer Trim, O Shimmer Trim, how silver are your sparkles...sing with me. ;) Come on, you knew I would add some, didn't you?

I hope you have been inspired to create your own Christmas decor and paper projects using some of the products you have seen along our hop! I only wish I had more time to make EVERYTHING that pops into my head!
DON"T FORGET to make sure you enter the Rafflecopter drawing on the Damask Divas page at the beginning of our hop! I am giving away the beautiful Christmas My Acrylix set, Blessings of Peace. This is a fabulous time of year to use it!

Don't miss your chance to win if your mailing address is in the USA! :)
Your next stop along our merry hop is Melissa Thompson at My Love 4 Creativity. I can't wait to see her gorgeous creation! Remember, if you get lost on our hop, just check the Damask Divas Blog for a list of participants. :)